Showing posts with label before/after. Show all posts

Tuesday, October 19, 2021

IT'S BEEN A WHILE. LET'S CATCH UP

Hi, there. Remember me? I hope so! It's your friend Kathryn from WBL. In case you have been wondering what became of my little blog, I'll summarize:

1. Teaching online and in-person during a pandemic.

2. Child number 1 got married. 

3. Child number 2 got married. 

4. And in between, a 50th anniversary party for the best in-laws. 

That should explain my over-a-year's absence from blogging. This past year has been one of the busiest but best years in so many ways.

I know you've all been on the edge of your seats to find out what we did in our front flower bed. So... let's pick up right where we left off, shall we? If you missed the last post from August 2020 that I'm referencing, click and catch up here.

Here's a quick reminder of the before shot.

Our flower bed is big, really big, like too big. We were trying to keep things manageable, so here is what we ending up doing. 

We put in five Little Limelight hydrangeas from Lowe's. They were discounted because they weren't all that healthy, and since we had no idea if the deer would like them, we thought it would be a good place to start. 


They were blooming and green and did great at the beginning of the summer. To add some color for the approaching anniversary party we were hosting, I headed back to Lowe's to add some color.  I came home with four Torenia plants. It's a mounding annual, perfect for summer and fall. It was a new-to-me plant, and I loved them right away. The color is so vibrant. 


We planted them in the gap between the Limelights. 


They were beautiful most of the summer. However, the rabbits, deer, and bugs made sure they didn't stay that way too long. I sprayed the leaves, sprinkled human hair around, and checked on them daily as if they were my children. It's just really hard to compete with nature when you live in the woods. 

The annuals have been now been pulled up, and the Limelights are surviving; I'm just not sure for how long. We'll see what happens in the spring. 

Feel free to comment below with any advice you'd like to share about plants and the animals who love to eat them!

Glad to be with you again!

Wednesday, October 03, 2018

A NEW LOOK FOR OLD LAMPS AND LIVING ROOM THOUGHTS

A few weeks ago I shared a spray paint project in my Instagram stories. I had a lot of DMs (direct messages) about what paint I used. I thought you might like to know too.

I had been on the look out for two large lamps to use in my living room. I came across these at a local antique mall. I loved them and the pair was only $20! For the size, that was a steal. I left them the original green for months. But the room gets so little natural light, they were just too dark.


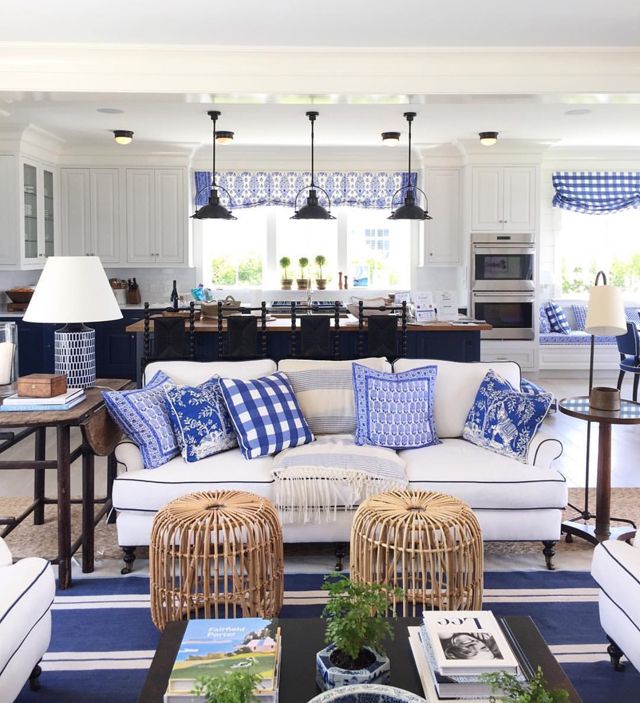
This room hasn't been updated in years, and it's on my to-do list. I want to eventually turn the really traditional room into what I'm calling a "coastal-traditional" room.
  • Blue and white
  • Neutrals
  • Browns
  • Hints of green
  • Natural textures

In my mind, that looks something like this:

Mark D. Sikes

Or this:

Ethan Allen

Or this:

Georgica Pond via Pinterest

So to get the process rolling, I went ahead and painted the dark lamps white.


Thanks to this Rust-Oleum paint, they turned out great. I'm really pleased with them. I usually buy the paint from Home Depot.


Step 1 of one thousand for the living room update now complete. :-)

I love the look of white lamps. Who's with me?

Cottage and Vine

Saturday, March 24, 2018

FEDERAL MIRROR FOLLOW UP

When I was putting together my anniversary post last week, I came across the pictures of my federal mirror I found last year and realized I've never posted about how it turned out or how I ended up using it.


I've always loved the look of a federal mirror, and I shared some pictures that inspire me here.

First things first...

I had to prep it for painting because I wanted it to be gold. Like the other round mirror I painted, it took a bit of extra prep time thanks to the shape and angles. I followed the same procedure as before. I used a small strip of tape, pressed it down against the edges with my thumb nail, and used a razor blade to trim the excess.


The paint I like to use for a really pretty, gold metallic finish is this one by Rustoleum.


Just like expected--nice and gold.


I'm using it in my dining room which was my plan all along. It feels slightly small for the spot I chose. But, I like it just as well for now.


Here are three other mirror projects I've shared.


Thanks for stopping by. Hope it's a great Saturday!

Friday, September 08, 2017

A ROUND MIRROR BEFORE AND AFTER

I recently painted my first round mirror. For those of you who have been reading along for a while, you know I've painted many mirrors over the years without too much trouble. If you're new to Woodbank Lane, you can see those projects here, here, and here. The round one was a bit more tricky to paint than the others and required a little more prep work. 

The mirror has primarily been in our foyer, but I've used it some in the dining room over the years as well. Here it is in the foyer with a spring look.


I always liked the silver color and details, and the hints of red were pretty, too.


So, about that prep work...

Very few areas of the mirror would allow me to simply slide the paper under.


I had to use the painter's tape on the spots with no space between the glass and the edge of the wood. And I couldn't use a big piece; only small pieces would work because of the angle. Once the tape was on, I used my thumb nail to make a firm crease.


Next, I used a razor blade to carefully trim off the tape.


The mirror is 36 inches.


The color of the paint I used is Indigo by Valspar. I picked mine up from Lowe's. It covers well, but takes its time drying. 


One more before look in the foyer...


And here's the after in the dining room. Blue!


It's a little hard to photograph; the lighting is only good for about an hour a day in the room. It looks darker to me in the picture. It turned out just like I hoped it would, and I love the navy with the brass lamps (more about those here) and green apples. It also looks good with a pile of blue and white in front of it. :-)


My husband thinks I'll grow weary of the blue. He may be right. But for now, it fits right in. You can see more of the room here

Hope you have a great weekend!

And Happy Birthday to my daddy who is 70 years young today!

Kathryn


Tuesday, July 18, 2017

RED TO WHITE DINING ROOM UPDATE

The paint is dry and things are shaping up in the dining room. Today I thought a would give you a quick update. I still have a little trim and some touch up here and there to do, but things are coming together.

But first, a list of the things I've learned during this project:

1. I am not as young as I once was; my elbow may never recover. This makes me extremely sad. I love to paint!

2. Red is a strong color and does not give up easily. It takes a bunch of white to cover red. :-)

3. Paint is such an easy way to refresh any space.

4. Paint is much cheaper than new furniture (in case you need to convince someone).

5. Most of the time, following your vision pays off.

Here are a few random before pictures:


And here are a few "so far" pictures. I won't call them "afters" just yet. The room still has a ways to go.

I've decided to go rug-less for now. The hardwood has been covered since we moved in and I want it to show. The hard wood in this room, our foyer, and our living room has a dark trim running throughout that matches the darker floor in the hallway on the kids' side of the house. I know that may be hard to visualize. The floor was like this when we moved in thirteen years ago this summer. I've never seen floors done this way, but it is a unique finish that I like.


 The china cabinet is stocked with white, and I added two new baskets atop.


I will put panels back on the windows eventually. I'm trying to decide if I want to add a pattern here or a pretty neutral. Thoughts?


Here is the current state of the buffet.


This is one of my inspiration pictures from James T. Farmer. He is one of my favorite southern decorators and the author of several books including A Place to Call Home and Porch Living.


That's where things are for now. Are you guys in the middle of any projects?

Kathryn