Showing posts with label crafts. Show all posts

Thursday, January 18, 2018

KEEPING UP WITH THE GOOD THINGS

I hope your year is off to a great start!

I saw the idea I'm sharing today online just a few weeks ago and thought it was terrific. I'm doing it myself this year, and I thought you all might want to do it, too. It's super easy and won't take up much time.


Friday, October 14, 2016

5 DIY IDEAS YOU CAN ACTUALLY DO

This is a super cute idea from Polka-Dotty Place. If you were hosting a baby or wedding shower, or any event that required table signs, this would be perfect.

Polka-Dotty Place

I loved the dressed up look of these pots from Garden Therapy. The things you can do with paint! And for nine other great ideas for terracotta pots head over to Better Homes and Gardens' page. Some super cute ideas there.

Garden Therapy via BHG

Here's a great idea for using mason jars as planters. Use wire or fabric mesh to keep your flowers in place and spaced like you want them. I pinned this from Driven by Decor. Kris is creative and has such a pretty, classic style. 

Driven by Decor

This might be my favorite from an ease stand point. These would make great teachers' gifts or a sweet hostess gift. I pinned this idea from Crafty Texas Girls.

Crafty Texas Girls

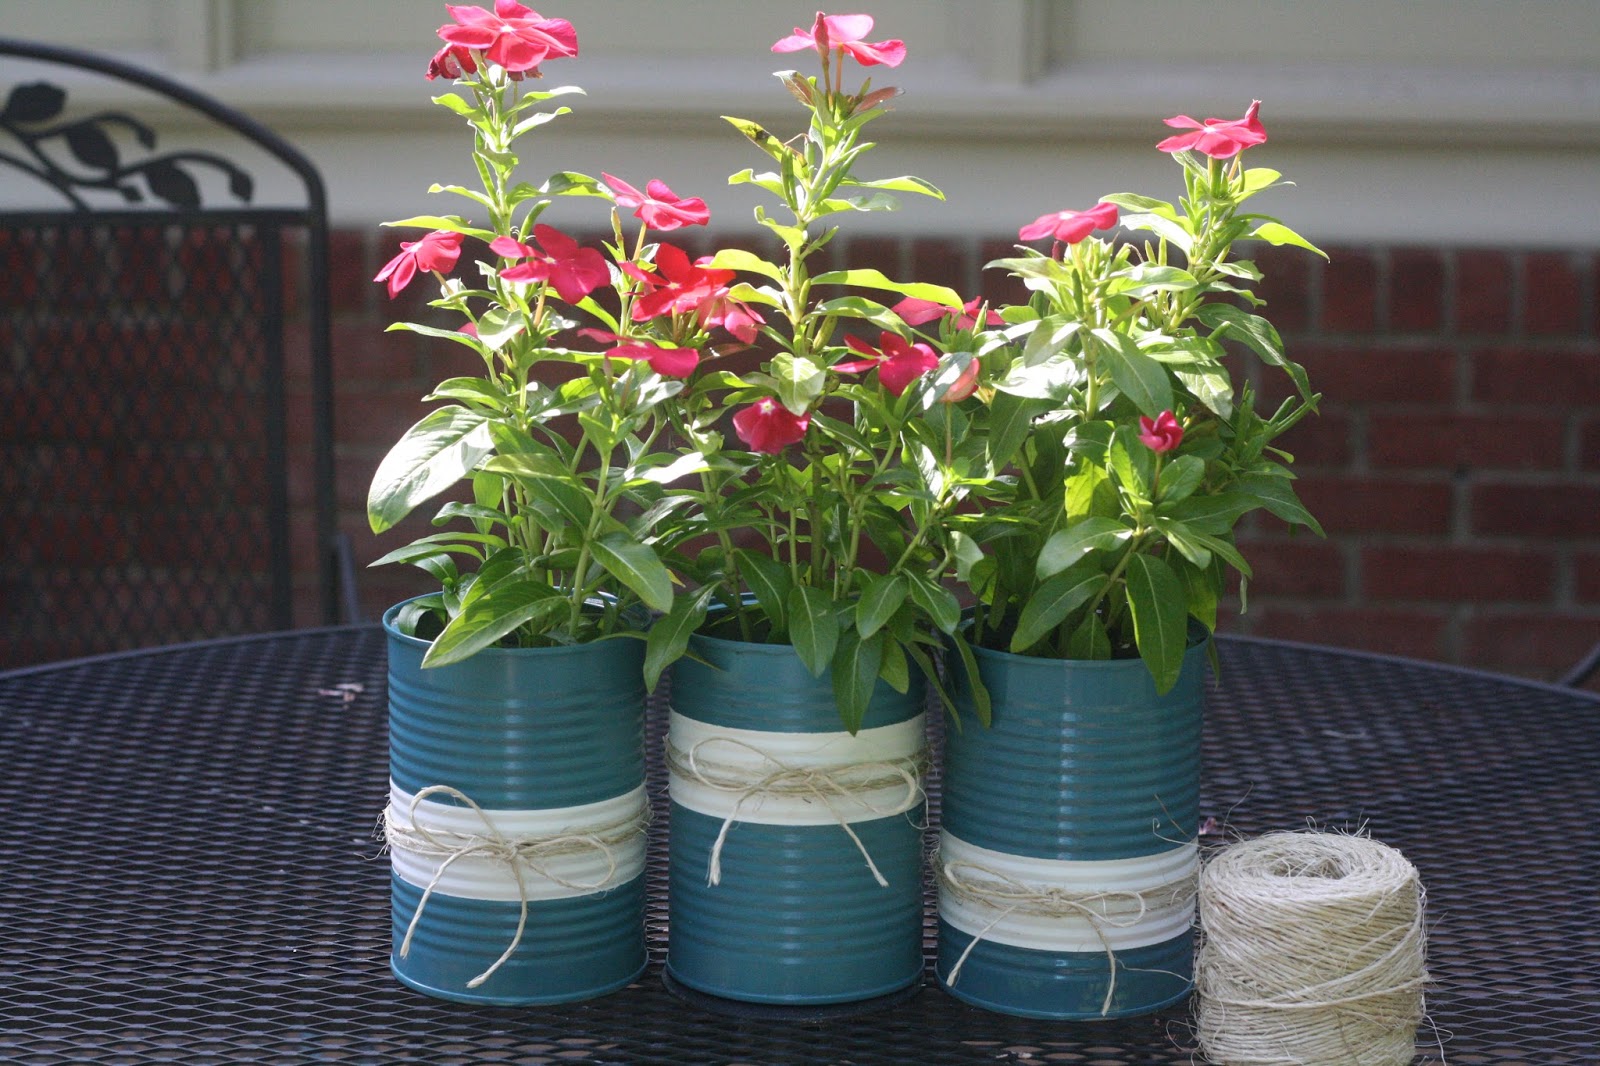
The ideas for coffee cans are endless. Here's one idea from my own back yard: painted planters.


And perfect for the time of year from A Diamond in the Stuff, pumpkins.

A Diamond in the Stuff via Pinterest
I plan on making the monogrammed candle holder first. Which one are you most likely to try? Leave a note. I love hearing from you guys. :-)

Kathryn

Tuesday, September 20, 2016

MY LATEST INSTAGRAM CONTEST WIN

I really shouldn't be saying this out loud, but I'm an Instagram give-a-away winner, again...

I'm starting to feel, well, lucky. The prize this time was a beautiful water color print from Ruth at GraceLaced. She is a talented artist, blogger, wife, and momma to a house full, who is also in ministry. Read more about her here.

I'm not sure why she chose me, but I'm happy she did. Right now, I'm using my print in a white frame from Micheal's on my desk in my faux office.


It was delivered with an information card, a bookmark, and a pretty little business card.


Her work is beautiful! Not only did I win one, but the friend I tagged as part of the contest did also--my friend Staci. To see more of her work, follow her on Instagram @gracelaced. Thank you, Ruth, for picking me!!

Have any of you won anything from a social media contest?

Kathryn

Friday, January 15, 2016

My first attempt at original art...

I hope you all are having a great start to 2016! We're having a super busy start. Two ballgames this week, a rehearsal dinner, and the wedding of the daughter of one of my closest friends--not much time for blogging. :-(

I returned to the classroom last week, and I was thrilled to see my students--just not sure they felt the same about me. My teenager slept late, 11 a.m. late, almost everyday of the break, so I know first hand most of them had alarm clock shock on those first few days back, but I think we're all into the swing of things now.

Do y'all remember me telling you soon I would be the oldest bridesmaid in history? It's almost time for the wedding and this past weekend we gathered to Kiss the Miss goodbye. The bridesmaids celebrated with an art outing and dinner. I had never done an art party before, and surprisingly, I enjoyed it. If you've thought about doing something like this yourself, you should! The cost was $25 and we were painting and snacking for about 3 1/2 hours. Great fun for a group of girlfriends!

And you get to wear an apron that makes you look like you know what you're doing.


Wednesday, September 30, 2015

DIY Picture Display

My daughter and I collaborated on this cute picture display for her college apartment - she bought most of the supplies and I did the handiwork.  She found this open back frame in the clearance bin at Michael's. It had a few dings in it, but since it was going to be spray painted, we didn't let that stop us. It was both the perfect size and the perfect price. :-)


I had left over white spray paint from another project, so we went with white.


Here are the supplies you will need if you want to give it a try also, which I highly recommend. (It's pretty easy.)

String, small staple gun, decorative clothes pins, and a measuring tape. 


I'm not sure how I ended up with it, but the measuring tape pictured is my granddaddy's. No telling how old it is - maybe even thirty years.

After painting the frame and giving it time to dry, flip it over and use your measuring tape to decide where you want your picture lines to go. Remember to start high so the last line of pictures isn't hanging off the frame. This took me a few tries - thus all the marks. (Math and I don't get along.)


Staple the first line of string, pull taut across, and staple on the other side.


And, because I don't do math, I didn't really secure the string until I was sure I had measured correctly and they were in the right spots. Then I went back and secured them.


That's the entire process.


Then, just add your clips in the spots you want them...


...and add your snap shots. She has already filled it up with pictures and it looks cute! It's a fun alternative to the traditional picture frame.

It's homecoming week at my high school. It's always great fun for the students, and really the teachers, too, but it wears us out!

Hope you are having a good week!
Kathryn

Saturday, September 12, 2015

Initial thoughts...

I'm sure you've all tried to do something at some point that you saw on Pinterest. Me too! And with a little help from a friend, one of my "I'm going to copy that thing I saw on Pinterest" projects turned out pretty cute. This is a pre-blog project from a couple of summers ago, so I don't have it photographed in steps. But I think I can explain it easily enough that you can try it as well with a little help from one of your friends. It was fairly easy and inexpensive.


Monograms of any shape or size are a thing right now (and always are in the South).
On a wall...

Spinters Wood Creations
On pillows...


On bedding...
HGTV has gorgeous monogrammed inspiration for bedding here.

HGTV via Ann Lowengart
The two pictures I saw on Pinterest that served as my inspiration are here and here.

I started with a basic black frame from Hobby Lobby. I bought it when they had their frames 50% off. I think it was $18 (1/2 of 36). My daughter's friend Nicolas made the initials for me, but there are vendors on Etsy making them if you don't know someone who does it.

Now, just looking at this, one might think it would be easy to simply put a sticker on a piece of glass. One would be wrong. We had to start in the center and work our way out. Hard is probably not the right adjective to describe this project, but time-consuming and patience-trying are. To make sure we were centering the sticker, we measured and put a dot with a Sharpie in the center of the frame. We did the same with the initials and lined up the dots. Slowly, we pulled the backing from the sticker and began pressing it on the glass, smoothing it with this Pampered Chef scrapper as we went. There's probably one in your kitchen drawer, too.


Once we finished, there were only a few air bubbles we missed. But overall, I think it turned out great! D for Doug, K for Kathryn, and W for us :-)


What's your latest project to copy from Pinterest?

Enjoy your Saturday! And as always, Roll Tide!
Kathryn

Wednesday, July 01, 2015

Coffee can project...

I'm sharing an easy project today. You only need a few materials, a trip to Lowe's, and a little bit of time. 

I stopped (cut back) drinking diet Dr. Pepper and picked up a coffee cup. This is what happened - I now have lots of nice cans. 


Nice cans
I realized my can collection was getting rather large during the week of spring break. My wheels started turning for what to do with them. I hated to just throw them away. Here's what I came up with...

I pulled all the paper I could from the cans. Then I let them soak about ten minutes in soapy water and scraped off as much as I could of the paper that was left. 


To get the remaining dabs of paper and the sticky off the cans, I used Goof Off. It worked great! The guy at Lowe's was right. I sprayed the cans really well and let the Goof Off stay on maybe two minutes. Then I wiped them down with a paper towel. I just followed the directions on the bottle. 


From Lowe's
Clean can!
While at Lowe's, I also picked up some primer for metal and a pretty blue spray paint. 


I started with the primer. I primed the cans and let them dry over night. 


I wanted them to have a little character, so I decided to give them a stripe with painter's tape. (Yes, I realize that the tape is not in the same spot on each can - my son's observation.)


I was careful to press the tape down hard on the can, especially on the edges, so the color wouldn't bleed. Then I sprayed the color on and waited a few days for it to dry.


I thought they turned out pretty good! 


The Mr. drilled drain holes in the bottom for me, so I could use them for flowers.
I added a little texture with string. 


Of course you could use them to hold just about anything and decorate them tons of ways!

Have you done anything crafty with your used containers? Leave a comment below. I would love to hear from you...

Kathryn